POV-Ray: Difference between revisions
m (→Procedure) |
(url update) |
||
| Line 6: | Line 6: | ||
== Tips and tutorials == | == Tips and tutorials == | ||
* [http:// | * [http://www.grassbook.org/neteler/povray/ Control scripts and example images by Markus Neteler] | ||
* [http://casoilresource.lawr.ucdavis.edu/drupal/node/80 Control scripts and example images by Dylan Beaudette] | * [http://casoilresource.lawr.ucdavis.edu/drupal/node/80 Control scripts and example images by Dylan Beaudette] | ||
Revision as of 21:03, 2 January 2011
About
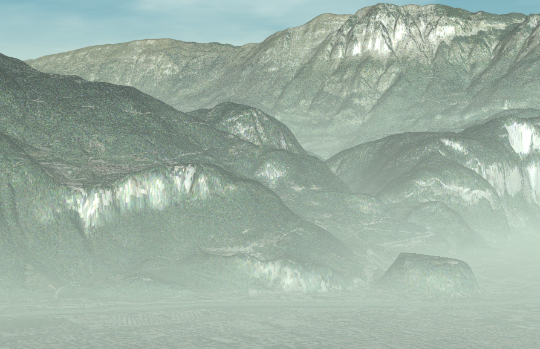
POV-Ray is the Persistence of Vision Raytracer. It makes pretty 3D maps.
GRASS has r.out.pov and v.out.pov modules for exporting maps to the software in the appropriate POV-Ray formats.
Tips and tutorials
- Control scripts and example images by Markus Neteler
- Control scripts and example images by Dylan Beaudette
Script to generate camera parameters for Povray
This script is an easy way to get the camera parameters for povray. Use to personalize one of the control files downloadable above from M Neteler's old Web page:
 #!/bin/sh
 #
 # generate useful parameters for POVRAY control file
 # Markus Neteler 7/2003
 # $Date: 2005-02-10 17:56:18 +0100 (Do, 10 Feb 2005) $

 if  [ -z "$GISBASE" ] ; then
  echo "You must be in GRASS GIS to run this program." >&2
  exit 1
 fi

 if [ $# -lt 1 -o "$1" = "help" -o "$1" = "-h" -o "$1" = "--help" ] ; then
  echo "Script to generate POVRAY control file coordinates"
  echo "Usage:"
  echo "     r.out.povscript dtm "
  echo ""
  echo "The script reports values according to the current region"
  exit 1
 fi

 DEM=$1

 # get n,s,e,w
 eval `g.region -g`
 # get extents
 eval `g.region -ge`
 # get centers
 eval `g.region -gc`

 echo ""
 echo "                                n:$n"
 echo "                        +-----------------+"
 echo "                        |                 |"
 echo "    w:$w     |                 |  e:$e"
 echo "                        |                 |"
 echo "                        |        c  <-*C  |    c: center ($center_easting $center_northing)"
 echo "                        |                 |    C: camera (pos: x 75%, y 50%)"
 echo "                        |                 |"
 echo "                        |                 | N-S extent: $ns_extent"
 echo "                        +-----------------+"
 echo "                                s:$s"
 echo "                 <- E-W extent: $ew_extent ->"
 echo ""
 echo "Povray control file parameters:"

 CAM1="`echo $e $w $ew_extent | awk '{printf "%f", (($1 + $2)/2 + ($3/4))}'`"
 CAM3="`echo $n $s | awk '{printf "%f", ($1 + $2)/2}'`"

 DEMZVAL="`r.what $DEM east_north=$CAM1,$CAM3 | cut -d'|' -f4`"
 DEMZVALHIGH="`echo $DEMZVAL | awk '{printf "%f", $1 + 700}'`"

 LOOK1="`echo $e $w | awk '{printf "%f", ($1 + $2)/2}'`"
 LOOK3="`echo $n $s | awk '{printf "%f", ($1 + $2)/2}'`"

 SCALE1=$cols
 SCALE3=$rows

 SUN1=$CAM1
 SUN3="`echo $s $ns_extent | awk '{printf "%f", ($1 - $2)}'`"

 echo "light_source:  < $SUN1, 7000, $SUN3 >"
 echo "Camera:        < $CAM1, $DEMZVALHIGH, $CAM3 >"
 echo "Look at:       < $LOOK1, $DEMZVAL, $LOOK3 >"
 echo "DEM scale:     < $ew_extent, 65535, $ns_extent >"
 echo "DEM translate: < $w, 0, $s >"
Usage example
Idea
Make a 3D rendering of a panoramic scene with some 3D vector objects added (e.g., a building, a tower etc). We use GRASS here to get all data into a unique coordinate system (esp. for the 3D vector objects which are usually not geocoded).
What's needed
You need a (detailed) elevation model (DEM), a color orthophoto to drape over and geocoded 3D vector data, perhaps originating from CAD software.
Procedure
Preparation:
- Create GRASS location if you don't have it already, for example in UTM projection (use Location wizard)
- Import the elevation model (DEM, usually in GeoTIFF format, import with (use r.in.gdal)
- Import the orthophoto (comes typically in separated R/G/B channels within one GeoTIFF file, import with (use r.in.gdal)
- Combine the usually separated R/G/B channels into one single colorized orthophoto composite (r.composite). Do not forget to set the current region to one of the channels first using g.region.
- Import the 3D vector data (typically in DXF format and typically not geocoded but in xyz-coordinates, use v.in.dxf)
- Geocode the 3D vector data (using v.transform). A 4 points transform will be sufficient which rescales the x, y and z coordinates from the CAD geometric space to the geographic space.
Test visualization within GRASS:
- Make a test visualization with nviz): nviz elevation=my_dem color=my_ortho_rgb vector=my_building3d
Export into POV-Ray formats: If that's ok, then start to export the prepared geodata for POV-Ray:
- Export elevation model with r.out.pov: r.out.pov map=my_dem tga=my_dem.tga
- Export R/G/B orthophoto composite with r.out.pov: r.out.png in=my_ortho_rgb out=my_ortho_rgb.png
- Export 3D vector objects with v.out.pov: v.out.pov input=my_building3d output=my_building3d.pov objmod="pigment { color red 0 green 1 blue 0 }"
Rendering with POV-ray:
- Create POV-Ray rendering script (see here for examples), see above for script to easily calculate rough camera and sun position coordinates.
- Render it, for example (1100x900 PNG file) with: povray +Ipovscript.pov +Opovview.png +D +P +W1100 +H900 +A0.5
