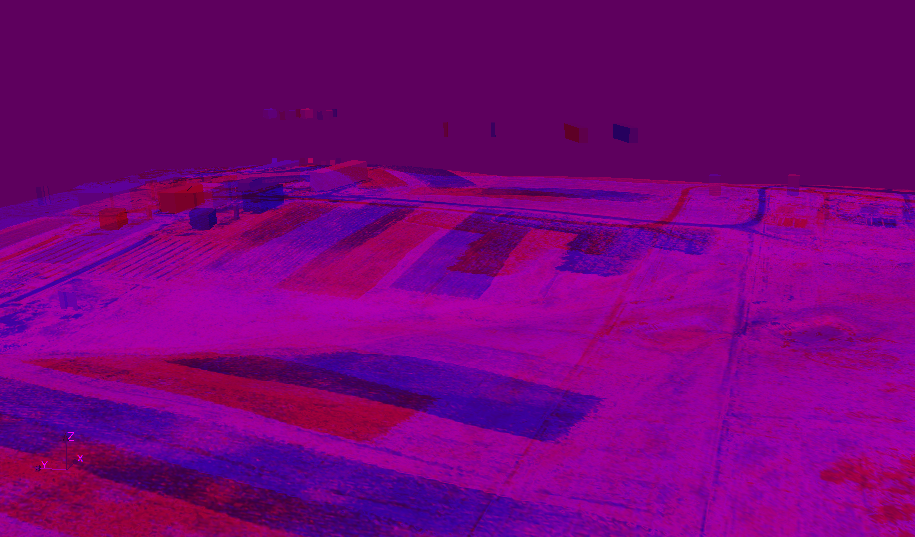
Stereo anaglyphs
How to create stereo anaglyphs with NVIZ
Example: http://grass.osgeo.org/screenshots/images/mars1ana_small.jpg
Step by step
This is a quick and dirty recipe to produce red-green anaglyphs on the fly in NVIZ.
Requirements:
- You will need a pair of red-green glasses to properly watch the anaglyph image.
- Both ppmtorgb3 and rgb3toppm are required.
Note: It shouldn't be too difficult to add the core functionality as a script into NVIZ. Then we could also have animated anaglyph movies, creature-of-the-black-lagoon-style !
Recipe:
Please remember that anaglyps trade color information for depth. Consider it as a black & white image, fancy surface colors will not show.
- Load the DEM of choice into NVIZ and find a convenient viewing angle.
- Assuming your position is not tilted, move the puck a tiny bit to the left and create a PPM image (for example "left.ppm").
- Shift a bit to the right and repeat. Create another ppm image there: "right.ppm"
[It takes practice to judge the necessary distance between the viewing angles. If the completed product doesn't exactly "jump out of the screen", try again with a larger distance. Otherwise, if the final product gives you a splitting headache when looking at it, opt for a reduced distance (or something nicer to watch).] - "ppmtorgb3 left.ppm"
→ Creates from left.ppm the files left.red, left.green, left.blue - "ppmtorgb3 right.ppm"
→ Creates from right.ppm the files right.red, right.green, right.blue - "rgb3toppm left.red right.green right.blue > myfirstanaglyph.ppm"
- Put on the red-green glasses and view myfirstanagly.ppm with your favourite image viewer.
Voila !
How to create stereo anaglyphs with Paraview
- Paraview is capable to render anaglyphs on the fly with --stereo (use r.out.vtk, r3.out.vtk, and v.out.vtk to export GRASS data to use with Paraview).
North Carolina data set example (download from http://www.grassbook.org/data_menu3rd.php):
Preparations:
  # P079215 is in PERMANENT
  # extract buildings, based on original DXF data set
  #
  v.extract in=P079215 out=bldg_resid where="layer='BLDG_RESID_BL'"
  v.extract in=P079215 out=bldg_cmcl  where="layer='BLDG_COMMER_BL'"
  # add height of the buildings
  v.extrude -t in=bldg_resid out=bldg_resid_3d elev=el_D792_6m height=10
  v.extrude -t in=bldg_cmcl  out=bldg_cmcl_3d  elev=el_D792_6m height=15
Take a look:
  g.region rast=elev_lid792_1m
  nviz elev_lid792_1m col=ortho_2001_t792_1m vect=bldg_resid_3d,bldg_cmcl_3d
Export to VTK format for Paraview:
  r.out.vtk ortho_2001_t792_1m out=ortho_2001_t792_1m.vtk elevation=elev_lid792_1m
  v.out.vtk bldg_resid_3d out=bldg_resid_3d.vt
  v.out.vtk bldg_cmcl_3d out=bldg_cmcl_3d.vtk
Normal view:
  paraview --data=ortho_2001_t792_1m.vtk
     # now load via menu:
     #   - bldg_resid_3d.vtk
     #   - bldg_cmcl_3d.vtk
Stereo view (put on the red-blue glasses):
  paraview --stereo --data=ortho_2001_t792_1m.vtk
     # now load via menu:
     #   - bldg_resid_3d.vtk
     #   - bldg_cmcl_3d.vtk
