GRASS 6 Tutorial/Getting Started: Difference between revisions
(Created page with "===Getting started=== If you have already installed GRASS GIS on your system, you can continue to the next section. Otherwise, please consult the [http://grasswiki.osgeo.org/...") |
No edit summary |
||
| Line 23: | Line 23: | ||
''If you are using your own data, please consult the Location Wizard sections [http://grass.osgeo.org/grass64/manuals/helptext.html here].'' | ''If you are using your own data, please consult the Location Wizard sections [http://grass.osgeo.org/grass64/manuals/helptext.html here].'' | ||
[[Category: Tutorial]] | |||
Latest revision as of 09:46, 9 August 2013
Getting started
If you have already installed GRASS GIS on your system, you can continue to the next section. Otherwise, please consult the Installation Guide, which covers all of the main operating systems. If you want to compile GRASS GIS from source, you should follow these Instructions.
If this is your first time using GRASS GIS, we recommend that you download the GRASS GIS sample data, for instance the North Carolina dataset and uncompress into your GIS data directory.
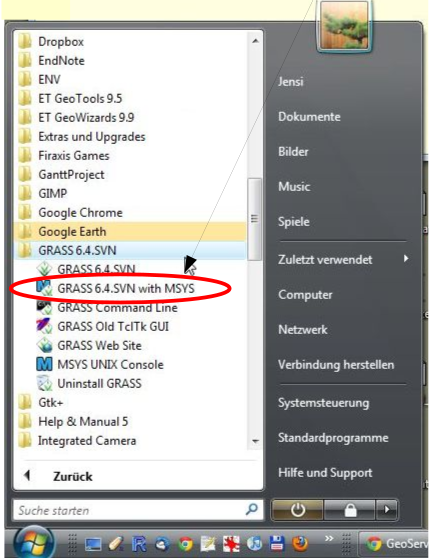
You can use GRASS GIS using either the GUI or the Command Line Interface (CLI) or a combination of both. If you are running GRASS within a Windows environment, you should click Start --> Programs --> GRASS 6.4 with MSYS.

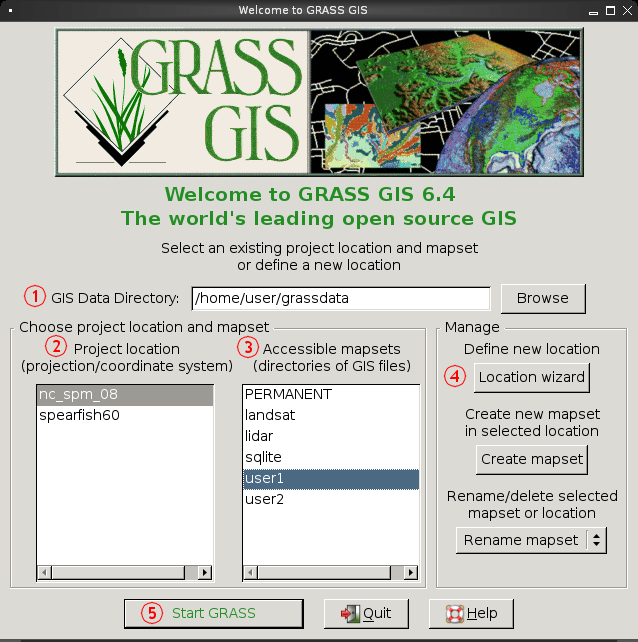
If you are running GRASS on Linux or Mac, you can also run it from the menus in your window manager, or simply type grass64 -gui on the command line. This will open the start-up window, where you will need to input and/or select the following details:
- GIS data directory
- Location (Project) name
- Mapset (Sub-project) name

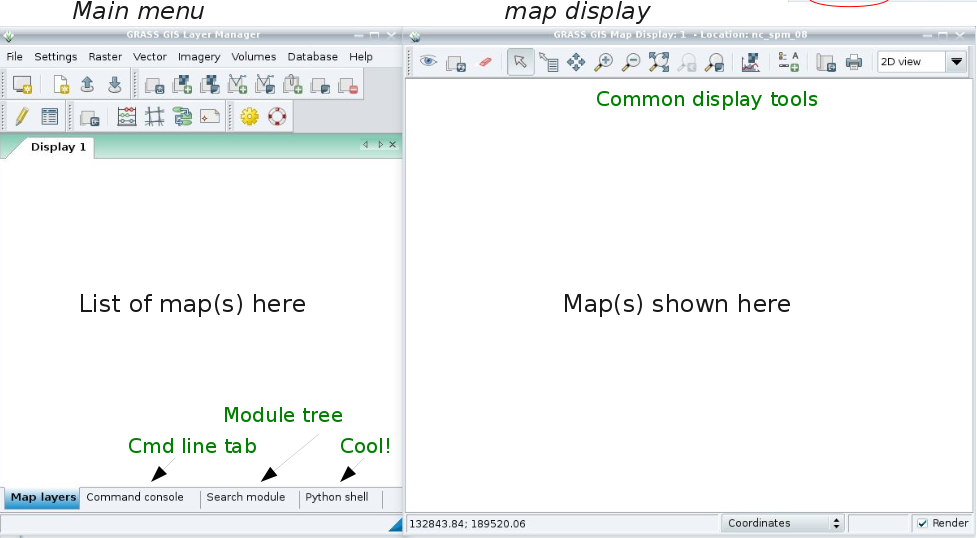
Once you have selected your options, you can then click 'Start GRASS' (numbered 5 on diagram) and the GRASS GUI (main menu & map display window) will open:

If you are using your own data, please consult the Location Wizard sections here.